Adding Tracks and Using Smart Tempo in Logic Pro
Are you interested in producing your own tracks? Logic Pro is Apple’s digital audio workstation and is an application that worship leaders can use to produce and run their tracks. Logic’s simplistic design makes it user-friendly and is great for beginner-level producers. This blog series on Logic Pro focuses on the features you need to know to get started!
Before you start adding tracks into Logic, you need the tracks! Go to LoopCommunity.com to browse the largest collection of tracks for worship. Once you’ve found a track you want, purchase the File Download version. Now that you have the tracks you want, let’s look at how to add them to Logic.
Adding Tracks
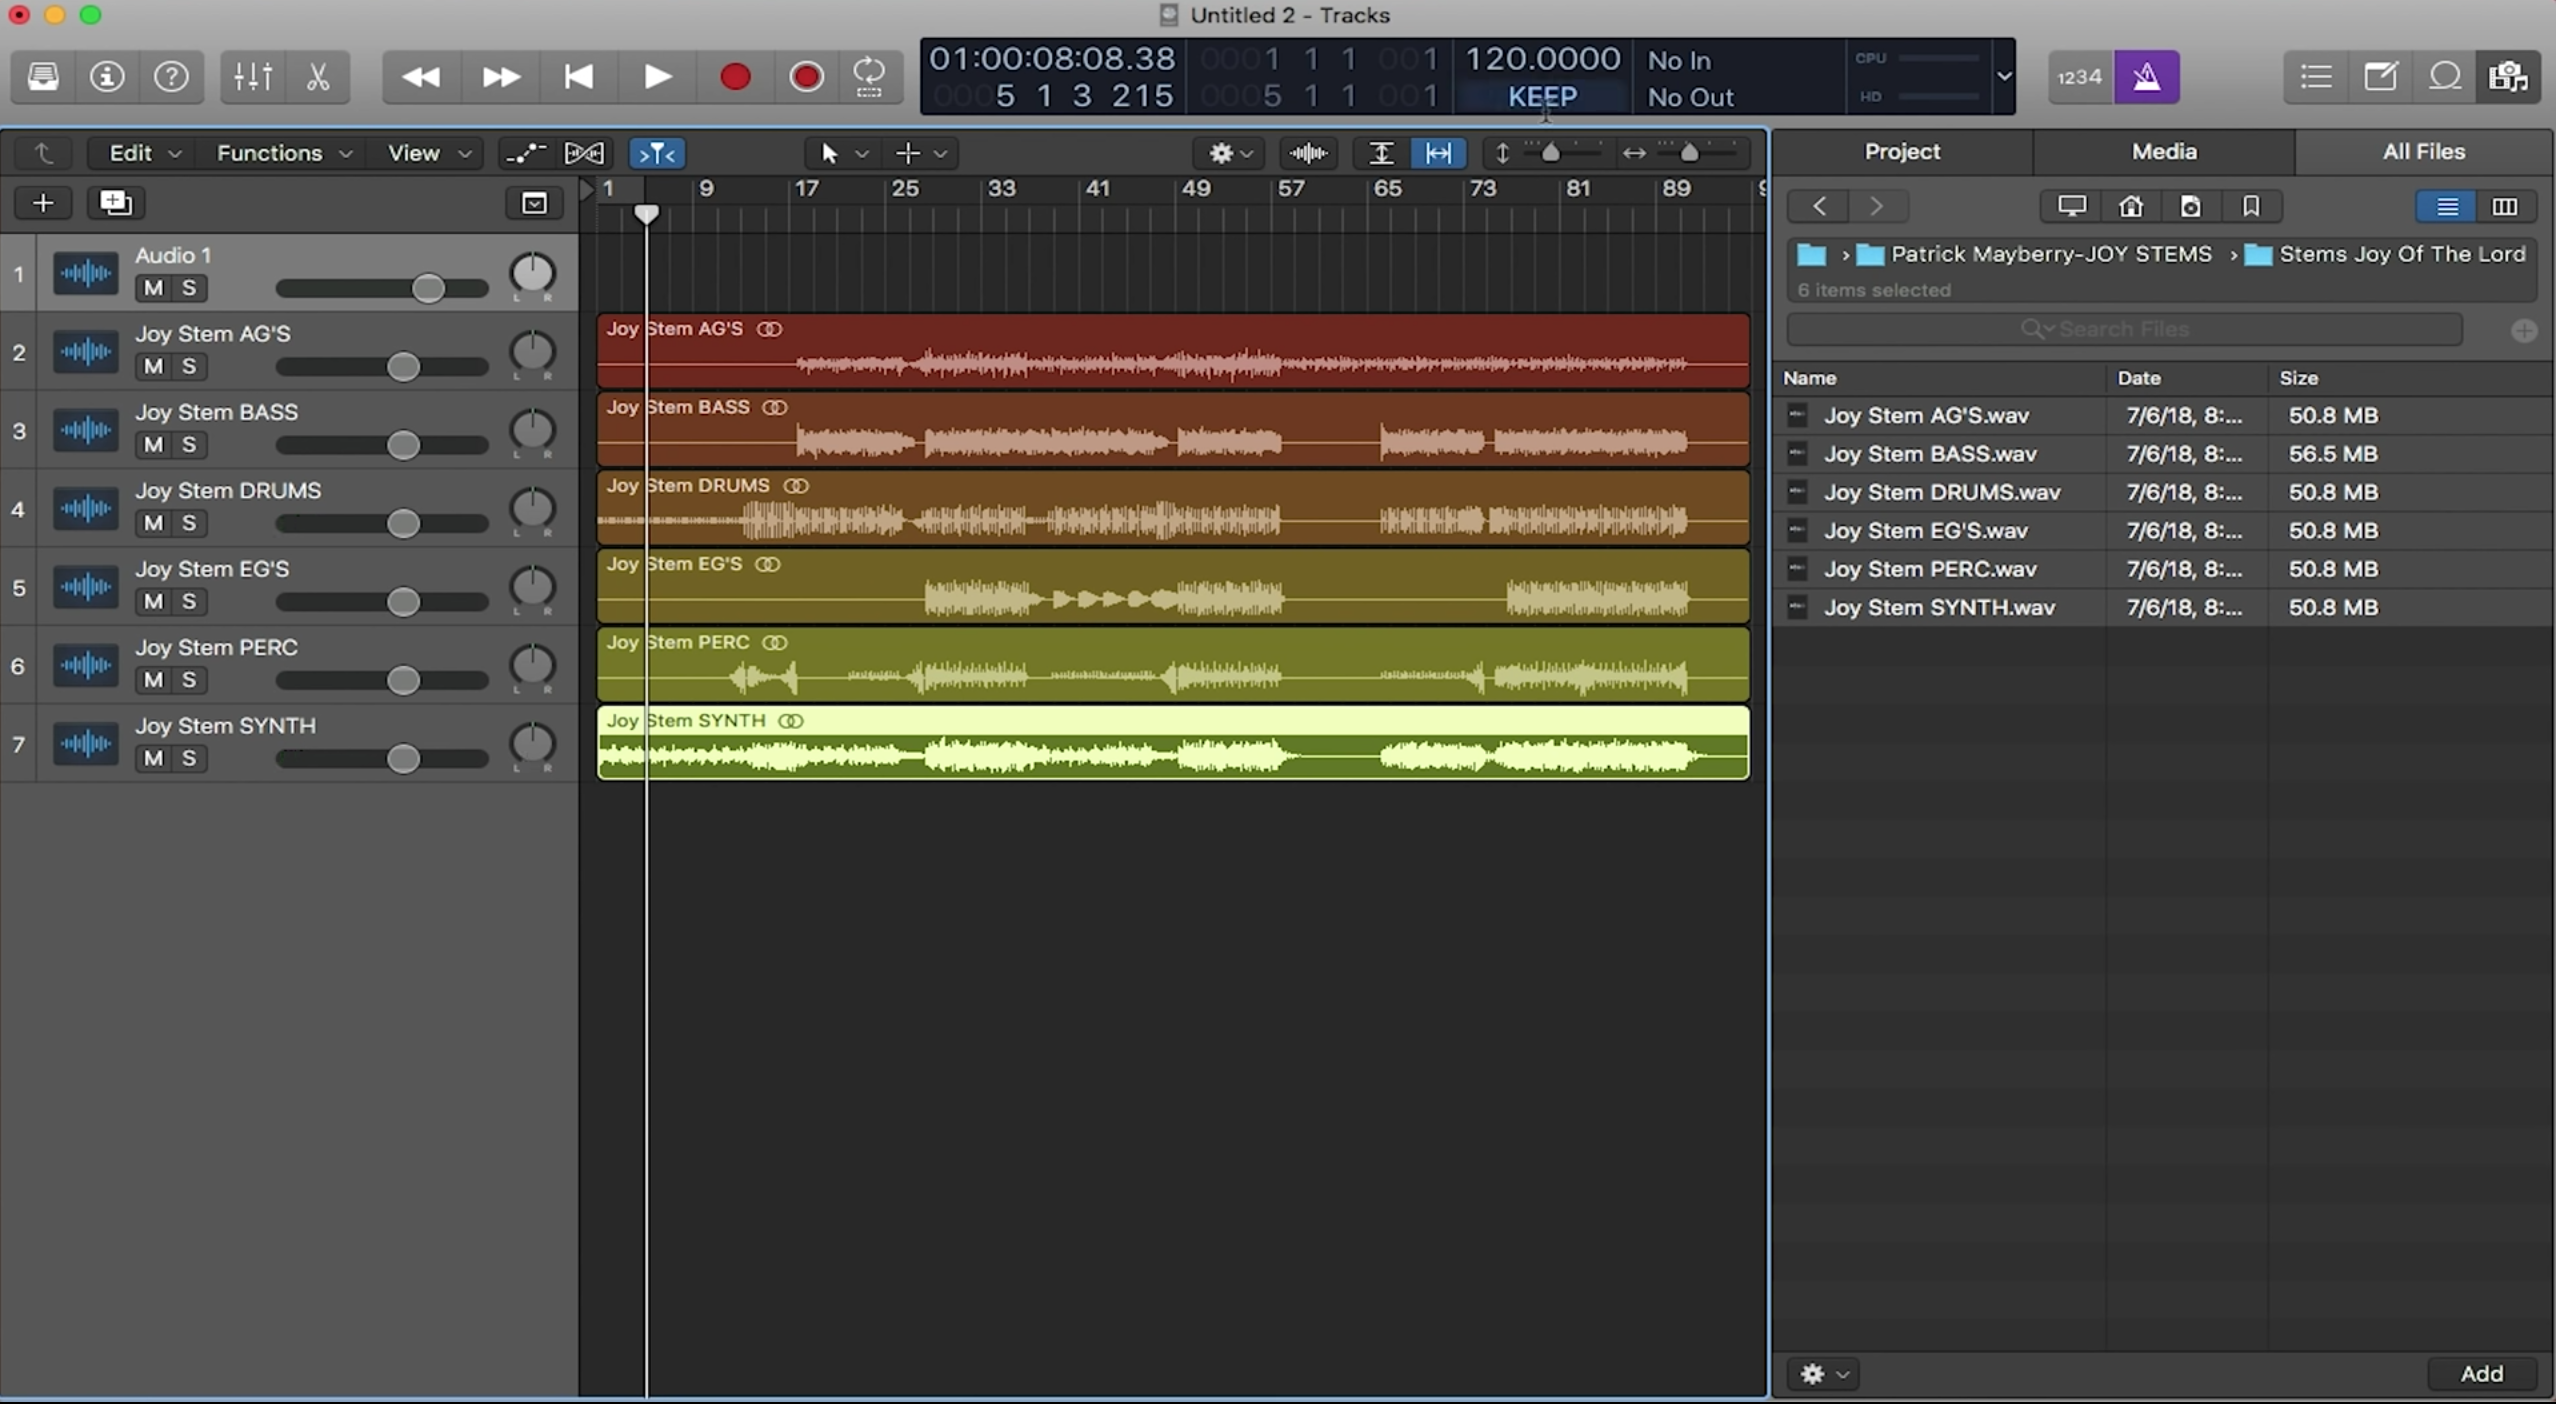
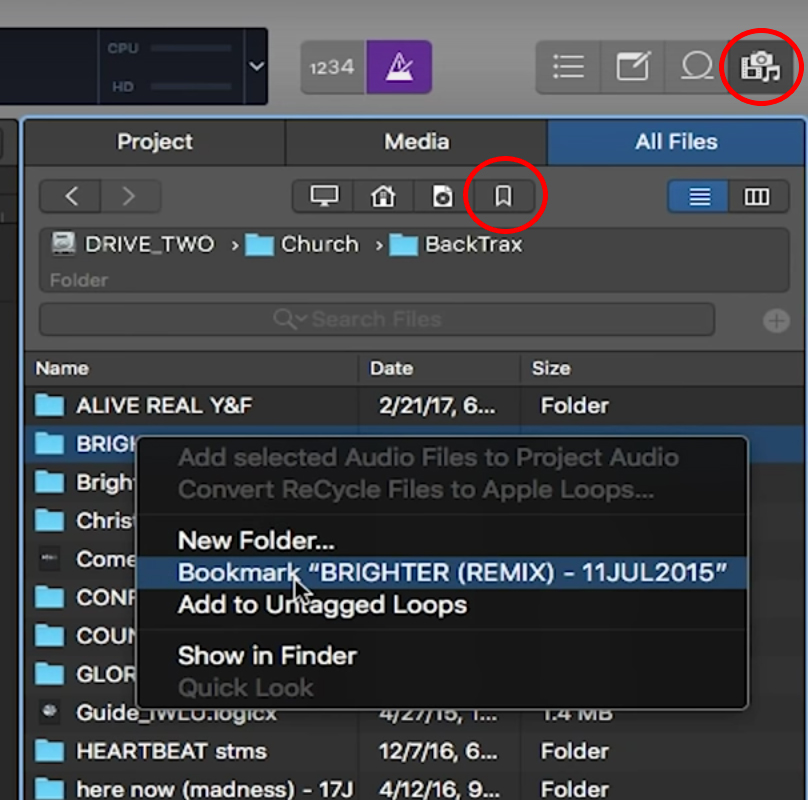
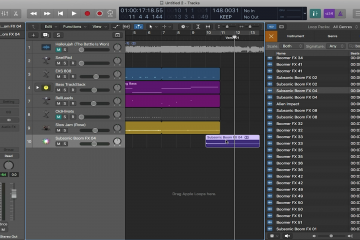
One way to add in tracks to your session is with Logic’s File Browser. You can open the File Browser by clicking the File Browser button at the top right of the screen. Once the File Browser is open, you can search your computer files for the tracks you want to import. Once you have found your tracks, click and drag them into Logic. Logic also gives you the option to bookmark certain folders. This is great if you store all your tracks in one folder on your computer. You can bookmark folders by right clicking on the folder and selecting “Bookmark ‘Folder Name’”. All of your bookmarked folders will appear when you click on the bookmark button at the top of the File Browser.
Finding Your Track’s Tempo
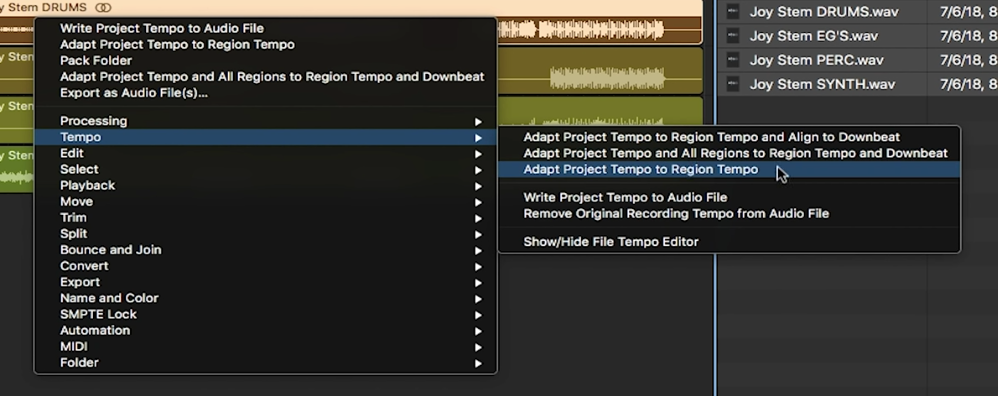
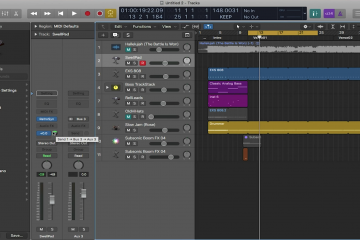
If you already know the tempo of your track, simply change the tempo in the control bar. If you don’t know the tempo of a song, Logic can find out for you. To do so, right click on any track in your session. For the most accurate reading, pick a rhythmic track such as a drum or percussion track. Next, select “Tempo”, then “Adapt Project Tempo to Region Tempo”. This will let Logic analyze the track’s transients in order to find the correct tempo.
Smart Tempo
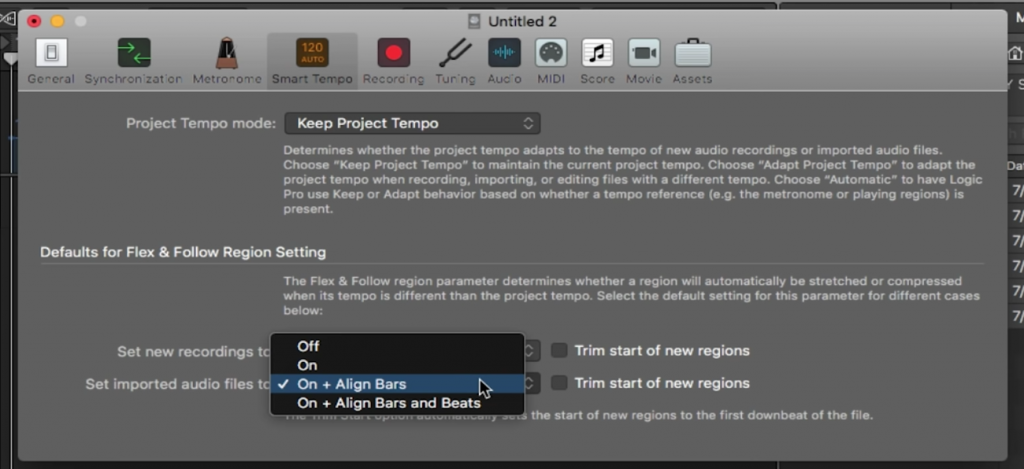
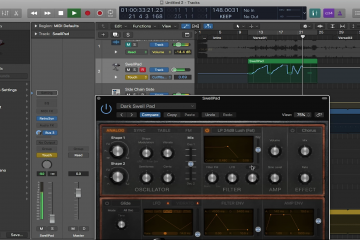
Logic also has a tempo feature called Smart Tempo. Smart tempo is a powerful tempo analysis tool that allows you to easily change the tempo of a track. This is similar to the “Adapt Project Tempo to Region Tempo” button previously mentioned, except more seamless. Before taking advantage of Smart Tempo’s capabilities, we advise changing one setting so that Logic can more accurately read your tracks. Right click under the project tempo and select “Smart Tempo Project Settings…” The settings window will pop up with the Smart Tempo tab open. Next, click “Set imported Audio files to:”, and then select “On + Align Bars”. This enables Logic to recalculate the tempo on every bar and makes for a more accurate tempo reading. Now you are ready to use Smart Tempo.
Smart Tempo has three different modes: Keep, Adapt, and Auto.
Keep Mode
When in Keep Mode, the Project Tempo in the control bar is king. Whenever you import a track into the session, that track will change its tempo to whatever the Project Tempo is. If you change the Project Tempo, all the tracks currently in your session will change with it.
Adapt Mode
In Adapt Mode, whenever you import a track into the session, Logic will analyze its tempo and change the Project Tempo to the track’s tempo. However, it will only change the Project Tempo within the duration of that track. For example, if you import two different tracks with two different tempos, the Project Tempo will change to that track’s tempo when you are in it.
Auto Mode
Auto Mode is a mixture of both Keep Mode and Auto Mode. The initial track you import sets the Project Tempo, and then any track after that stays at that Project Tempo.
Logic Pro is great for worship leaders because it allows you to change the tempo of your tracks with ease.
1 Comment
Joseph Larson · February 20, 2023 at 3:18 am
Thanks for this article very useful information.