Using a Looptimus with Prime
One of the biggest things we hear from worship leaders that use the Prime App to run their tracks is “How can I be more spontaneous with my tracks? I don’t want to be stuck to my tracks”.
Prime gives you a lot of ways to be able to do this. One of the best ways is section jumping. Section jumping allows you to jump between sections in a song. Pairing this feature with the Looptimus MIDI controller makes it easy to take control of your tracks hands-free.
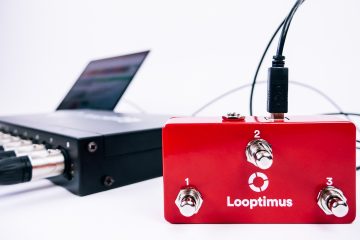
Connecting Looptimus
The first thing you’ll want to do is connect your device running Prime to your Looptimus. You can do this with a USB cable. If you are using an iPad or iPhone, you’ll also need an Apple brand adapter. Depending on your device, you’ll need either the Lightning to USB Apple Adapter, or the USB-C to USB Apple Adapter. Connect the USB cable to your Looptimus, then connect the other end of the USB cable to the Apple Adapter. Finally, connect the adapter to your iPad/iPhone running Prime. Once everything is connected, Prime’s MIDI button will light up.
Mapping Prime to the Looptimus
Looptimus is plug and play. This means that it doesn’t use any drivers or need any installation. It’s ready to go right from the start. Select the MIDI button in the top left corner of Prime to enter MIDI mapping mode. By default, Prime may have already assigned some buttons to your Looptimus. These are the default MIDI mappings. To delete these settings, select the ERASE button at the top left. Now, anything with a white box can be mapped. To map a button, simply select the white box, followed by the desired button on your Looptimus. After you have created your mappings, select the MIDI button again, and you’re ready to go!
There are many different ways you can map out Prime to your Looptimus. The most basic would be to assign each button a song. This will allow you to toggle between each song quickly. Another way to map your buttons in Prime can be to map all of the transport controls such as play, next, stop etc. We also recommend mapping the stop button in Prime to the stop button on the Looptimus as it is a global button. This allows you to stop your tracks no matter which bank you are in.

A great way to map individual sections of a song would be to map button 1 to the intro, button 2 to the first chorus, button 3 to verse 2, etc. With this method, you will need to map each of your tracks in your setlist.
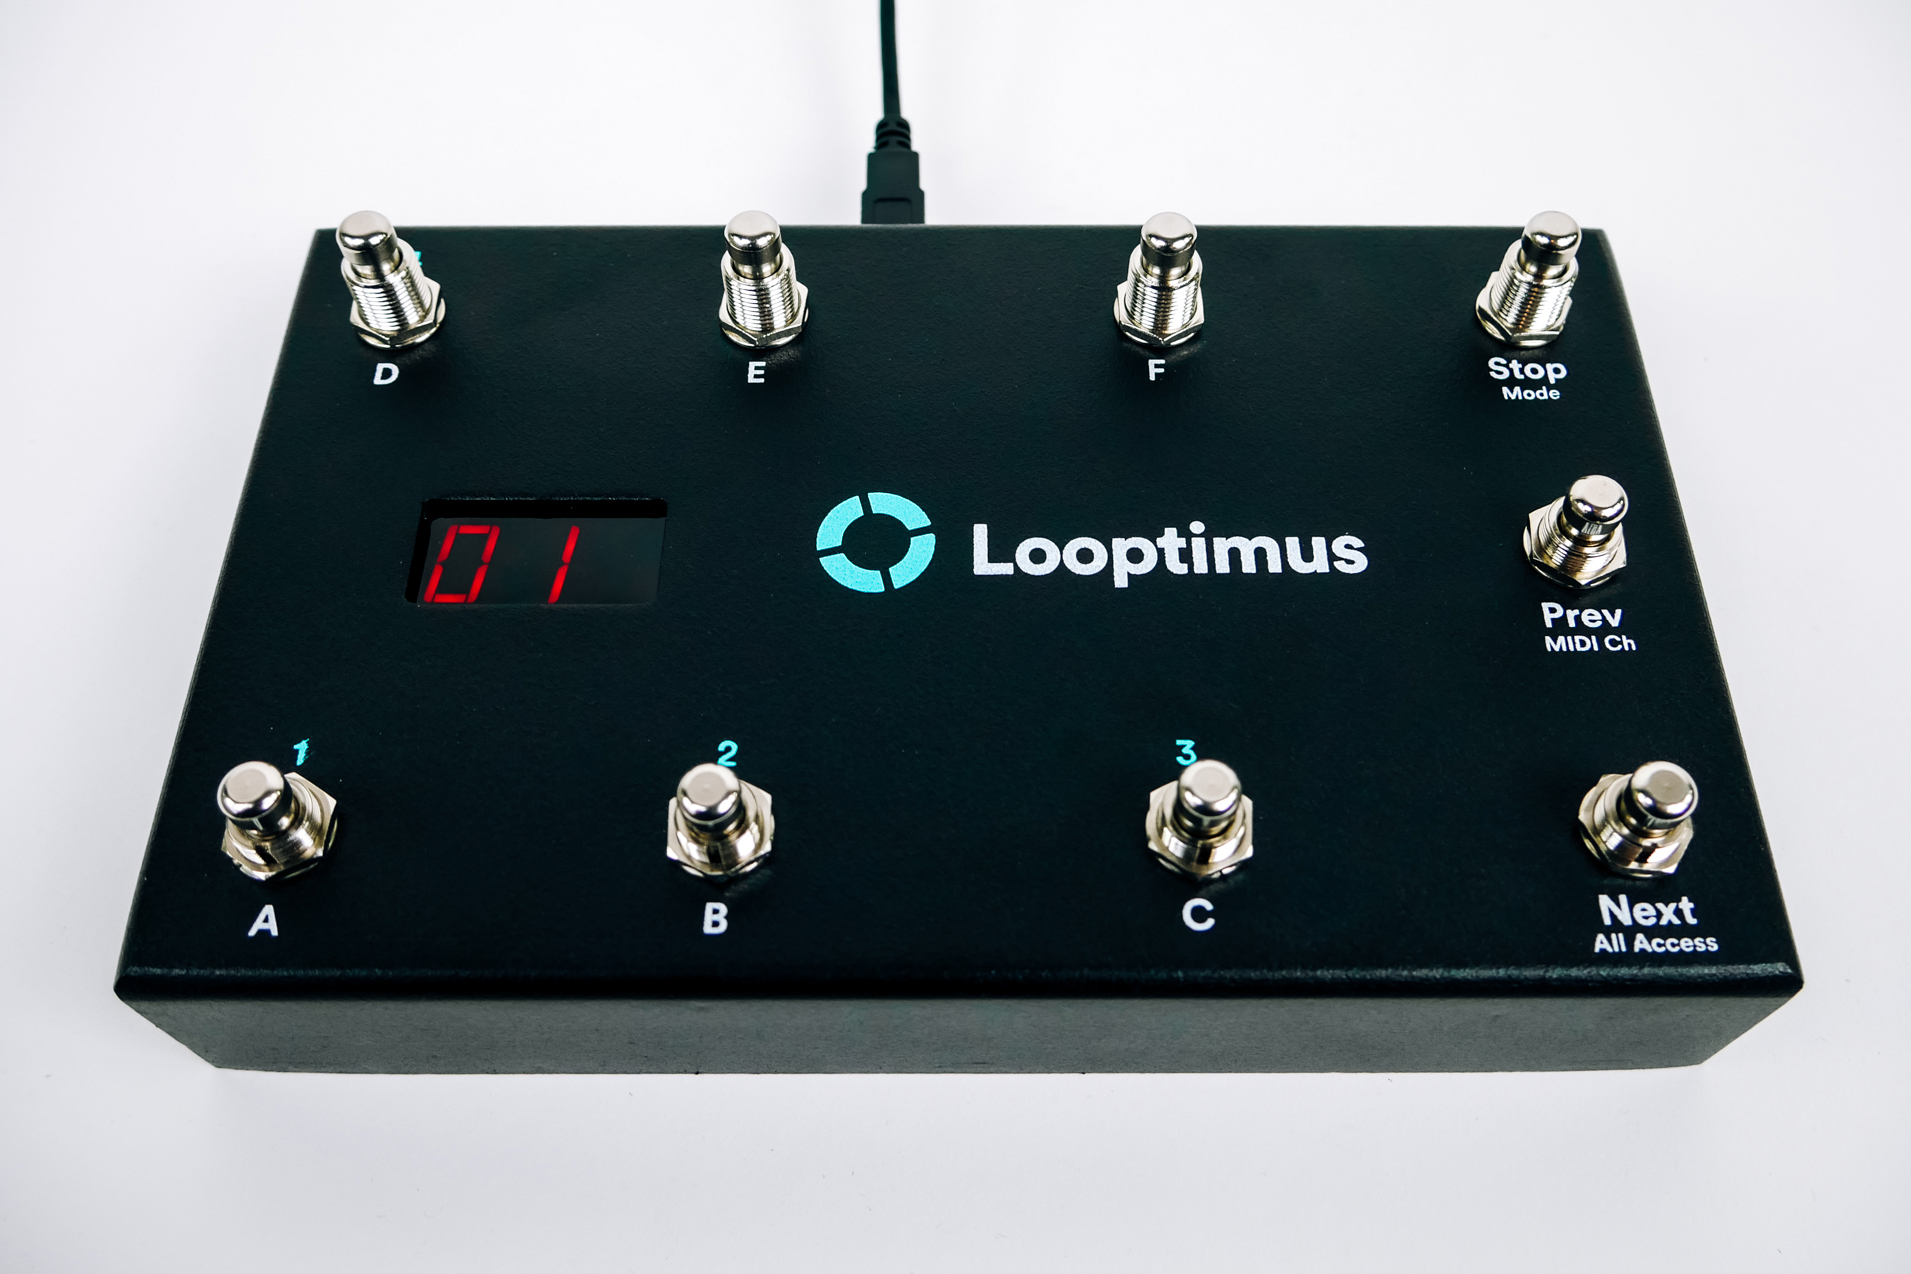
At first glance, it may not seem possible, but the Looptimus actually contains banks or pages which makes this possible. The left-most 6 buttons on the Looptimus are buttons in a bank. When you select the previous or next buttons on the Looptimus, then you will toggle a different bank that will be displayed on the LED screen with a number. The Looptimus has 20 banks, each with six buttons allowing for the mapping of 120 MIDI signals.
Now in the case of Prime and mapping within your setlist for section jumping, a good idea would be to designate the first song in your setlist to bank 1, the second song to bank 2, and so on. Once you have mapped sections to every song in your setlist, designating one bank to one song, you are well on your way to controlling Prime hands-free.
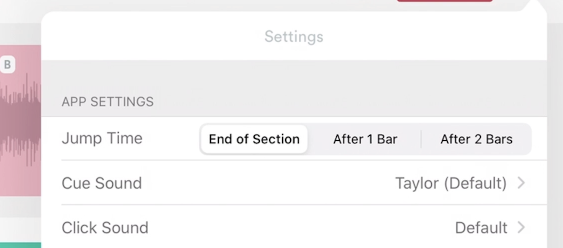
Jump Time Settings
If you click on the settings button in Prime, you will see that you have the ability to change the jump time. This setting refers to the length of time after you toggle a section to when the new section will come in. We highly recommend keeping this setting on “End of Section” so that Prime doesn’t skip to a new section awkwardly or in the middle of a lyric.
The Looptimus can do a lot of things to help you take full control of your tracks. Order yours today on Looptimus.com.
0 Comments