3 Ways to Send Your Tracks to Your Sound System
It’s one thing to know how to create a rock-solid Ableton Session, but when it comes time to move from your church office to the stage, connecting your computer to the sound system is a vital step. As with many other things in Ableton Live, there are multiple ways of doing the same thing. It all depends on your setup, workflow and personal preference. There are three ways that I’d recommend looking at when deciding how to get your tracks heard through the sound system and the click to your band.
1. Headphone Jack
Sometimes simple is best. This is honestly the easiest and most affordable way to send tracks to your sound system. It’s also perfect for beginners or worship leaders who want a really fast setup. Many people who first start using tracks are confused by the headphone jack. They think that because it’s a single jack it only has one output. However, your headphone jack is a stereo output. This means you can use the left side of the headphone jack to send your click and the right side to send your tracks. In Ableton Live, all you need to do is choose “Built-in Output” as your audio output device from the audio settings tab in preferences. Then on each track, choose “Ext. Out” in the dropdown called “Audio To”. You’ll be given another dropdown where you can choose which side of your headphone jack to send the audio. Selecting ‘1’ will send the audio to the left side of your headphone jack and ‘2’ will send the audio to the right side. You’ll need to buy a Hosa CMP-153 Stereo Breakout cable. You’ll then be able to plug each 1/4″ jack into Direct Boxes for your click and tracks. This is the setup I use about 75% of the time when I lead worship because I travel a lot to different churches and need an easy, quick and uncomplicated setup.

2. Audio Interface
The downside of using the headphone jack is that it doesn’t give your sound team full mix control over each individual track. When using the headphone jack, you’re sending all of your tracks out a single, mono output. This means that if your sound team wants to turn down the tambourine track, you would need to adjust it for them on the Ableton Live computer ahead of time. To solve this issue, another way to send audio to the sound system is by using an audio interface.
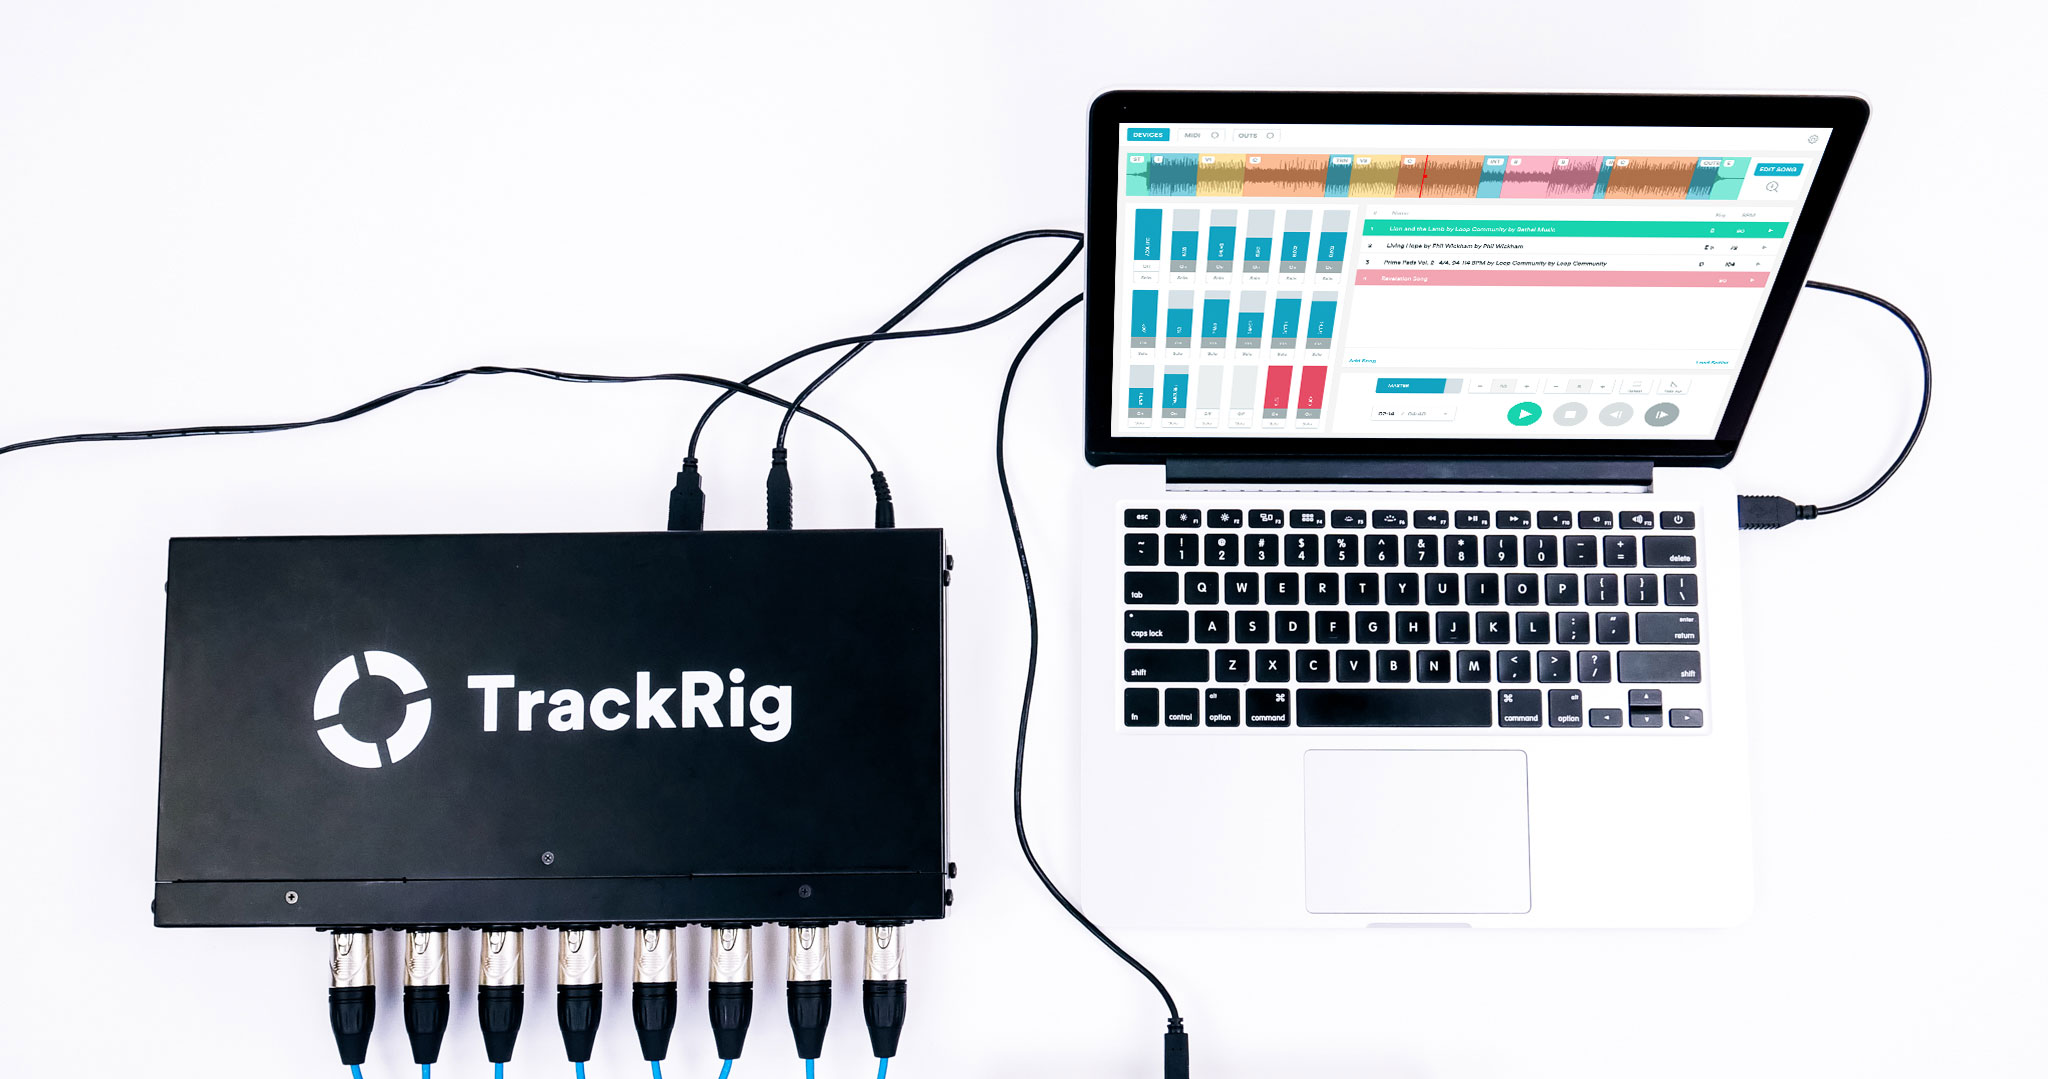
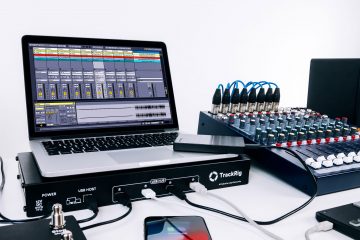
There are a lot of great options out there that will get the job done. I would recommend looking at anything by PreSonus, MOTU, or an audio interface that I helped design that’s called Track Rig. Don’t bother with an interface that doesn’t have at least 4 outputs. You need at least 4 outputs to make this option worth it. When using an audio interface, Ableton Live will let you choose which output each of your tracks goes out of. You can connect these interfaces directly to the sound system, or through direct boxes. I’ve never needed to use more than 8 outputs, because it can feel like you’re playing to a karaoke track. My best-practice tip is to group tracks together that have similar sounds. For example, I group and send all of my key tracks together out their own output. I do the same for percussion tracks, like shaker and tambourine. I also group and send all synth lead lines together and send them out their own separate output. This will be important for your sound team so they can EQ and mix the tracks properly.
Track Rig is an 8-channel audio output interface that gives you everything you need to run tracks, including a 4-port USB hub for MIDI controllers and hard drives. It has 8 XLR jacks, which eliminates the need for direct boxes. It’s really easy to set up because there aren’t audio drivers and configuration software to install. Be sure to check it out at TrackRig.com.
3. Dante
I’m beginning to see more and more larger, tech-driven churches use Dante to send audio from Ableton Live to the sound system. If your soundboard is compatible with Dante, you can use Dante Virtual Soundcard to send up to 64 channels from Ableton Live to your sound system. What’s awesome is that it uses the ethernet port on your computer, which eliminates the need for a snake, direct boxes, and other cables/adapters. When you plug in the ethernet cable, you’ll be able to route your tracks to up to 64 different channels – which is by far the largest number of channels you can get. No USB audio interface will give you that many. If you’re able to go the Dante route, it’s a great option. It’s very stable and the audio quality is excellent. To learn more about Dante systems, visit audinate.com.
These are all excellent ways to get your track audio from Ableton Live to your sound system. If you’re just getting started with tracks, I would recommend the headphone jack. If you’re really comfortable with Ableton Live, try using an audio interface like Track Rig or Dante. If you’re interested in learning more about running tracks in worship, take my free course at tracksinworship.com.
Matt McCoy

8 Comments
Rodney Young Jr · January 29, 2020 at 3:08 pm
We’ve experienced issues when using prime and running it through Dante. We use mainstage and Prime on the same computer, and when we do so, we get a crackling sound through the system. This does not happen when we use a USB based interface. We usually run Ableton and mainstage from the same computer and have no issues using Dante. Do you have any suggestions?
Loop Community · February 3, 2020 at 8:29 am
Hey Rodney, we haven’t tested Prime with Dante, but we do know that other users have had success with it. One thing to check is that your Dante is set to 44.1 kHz, as that is what Prime sends the audio at. I’d also make sure the buffer settings are turned all the way up. Hope this helps!
Jeffrey · April 9, 2020 at 4:16 pm
So I’m using abelton live for our multitracks but no matter what I try I can’t split the click track and guide from the rest of the tracks, im using a breakout cable and driver boxes also im panning the click trackd to the right and the main tracks to the left but I still get a click coming out of the left side
Loop Community · April 14, 2020 at 11:01 am
Hi Jeffrey,
Here is a video that walks through how to route your audio from Ableton Live: https://www.youtube.com/watch?v=b0ms7gJKt98
If this doesn’t resolve the issue, send us an email@loopcommunity.com and our team can help.
Thanks!
Karl Helbig · June 29, 2020 at 5:54 am
I’m having the same trouble sending audio from prime to an Allen & Heath GLD console via Dante. The console clock is slave to the Dante card, and this is 48khz. All other audio coming from the MacBook syncs to the sample rate of the sound card and transmits fine (eg. Spotify, internet / YouTube, Reaper). Prime does not seem to do the same, and as a result I do not get clean audio to the console, so Prime is unusable. I am looking for reasons to choose Prime over Multitracks, and this is a deal breaker, so any support would be appreciated.
Loop Community · July 2, 2020 at 9:54 am
Hey Karl,
Prime sends audio at 44.1kHz due to the limit of audio for Apple apps. If you are able to change your board to 44.1, does this solve the issue you are experiencing? If not, please email support@loopcommunity.com and our team can help!
Brad M · July 21, 2022 at 2:39 am
Since posting this article, has there been any more testing of the Prime app with Dante? We’re looking at using a Macbook Pro. Does Dante Virtual Soundcard “see” the individual tracks coming from Prime so they can be routed through Virtual Soundcard?
Brady Fisher · October 25, 2022 at 5:16 pm
I am having the same issue. My Dante card only allows 48 or 96. I can run tracks in 48 on other apps on my Mac computer, it seems like this is a limitation of Prime?