How to Trigger Your Lights with Prime
With Prime’s MIDI Out feature, users can send Notes, Program Changes, and Control Changes from Prime! This allows you to sync your tracks with your lyrics, lights, and more. Today we’re going to take a look at Lightkey and how it can work with Prime. Lightkey is a professional DMX lighting control software that can be used for all types of live performance, including worship sets.
Note that the MIDI Out feature in Prime is only available with Loop Pro’s Plus, Premium or Ultimate subscriptions. To learn more about Loop Pro, click here!
Network Setup
Now before we are able to input our MIDI cues in Prime, we will need to do some setup work in our computer or device that is running Lightkey. Open up the “Audio MIDI Setup”. Then in the “Window” tab in the top toolbar, select “Show MIDI Studio”. From this new window, you will see a small button with a globe.
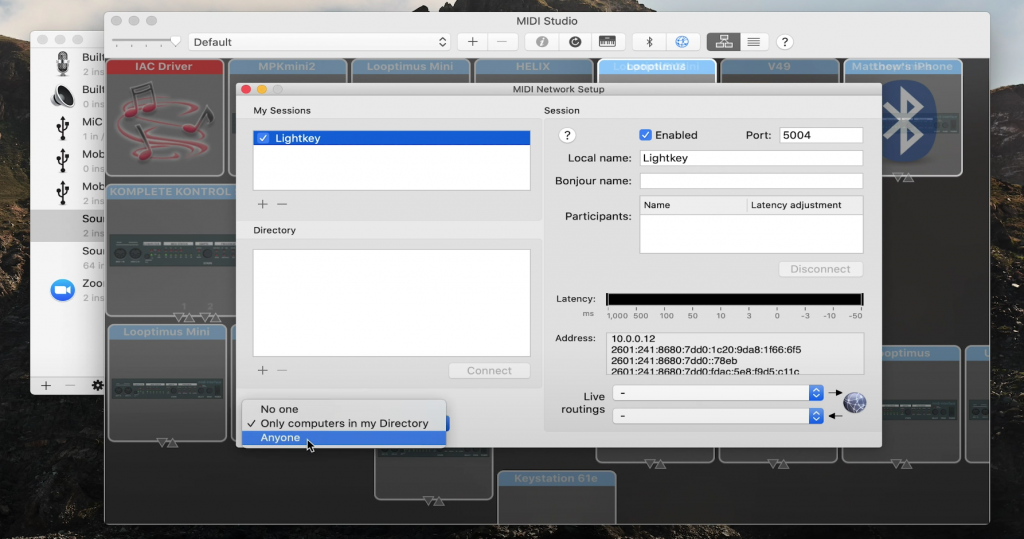
Click on the globe to open the “MIDI Network Setup” window. This window is where we will setup a MIDI network that allows the MIDI cues to travel between devices. In the top left corner, click on the “+” button to create a new network session. Feel free to name it whatever you like. To the left of the newly created session is a blank box. Click on it to enable the session. At the bottom of the window, there is a dropdown menu that is labeled “Who may connect to me:”. Make sure that it is set to Anyone. Once this is selected, you are ready to jump into Lightkey!
Setup in Lightkey
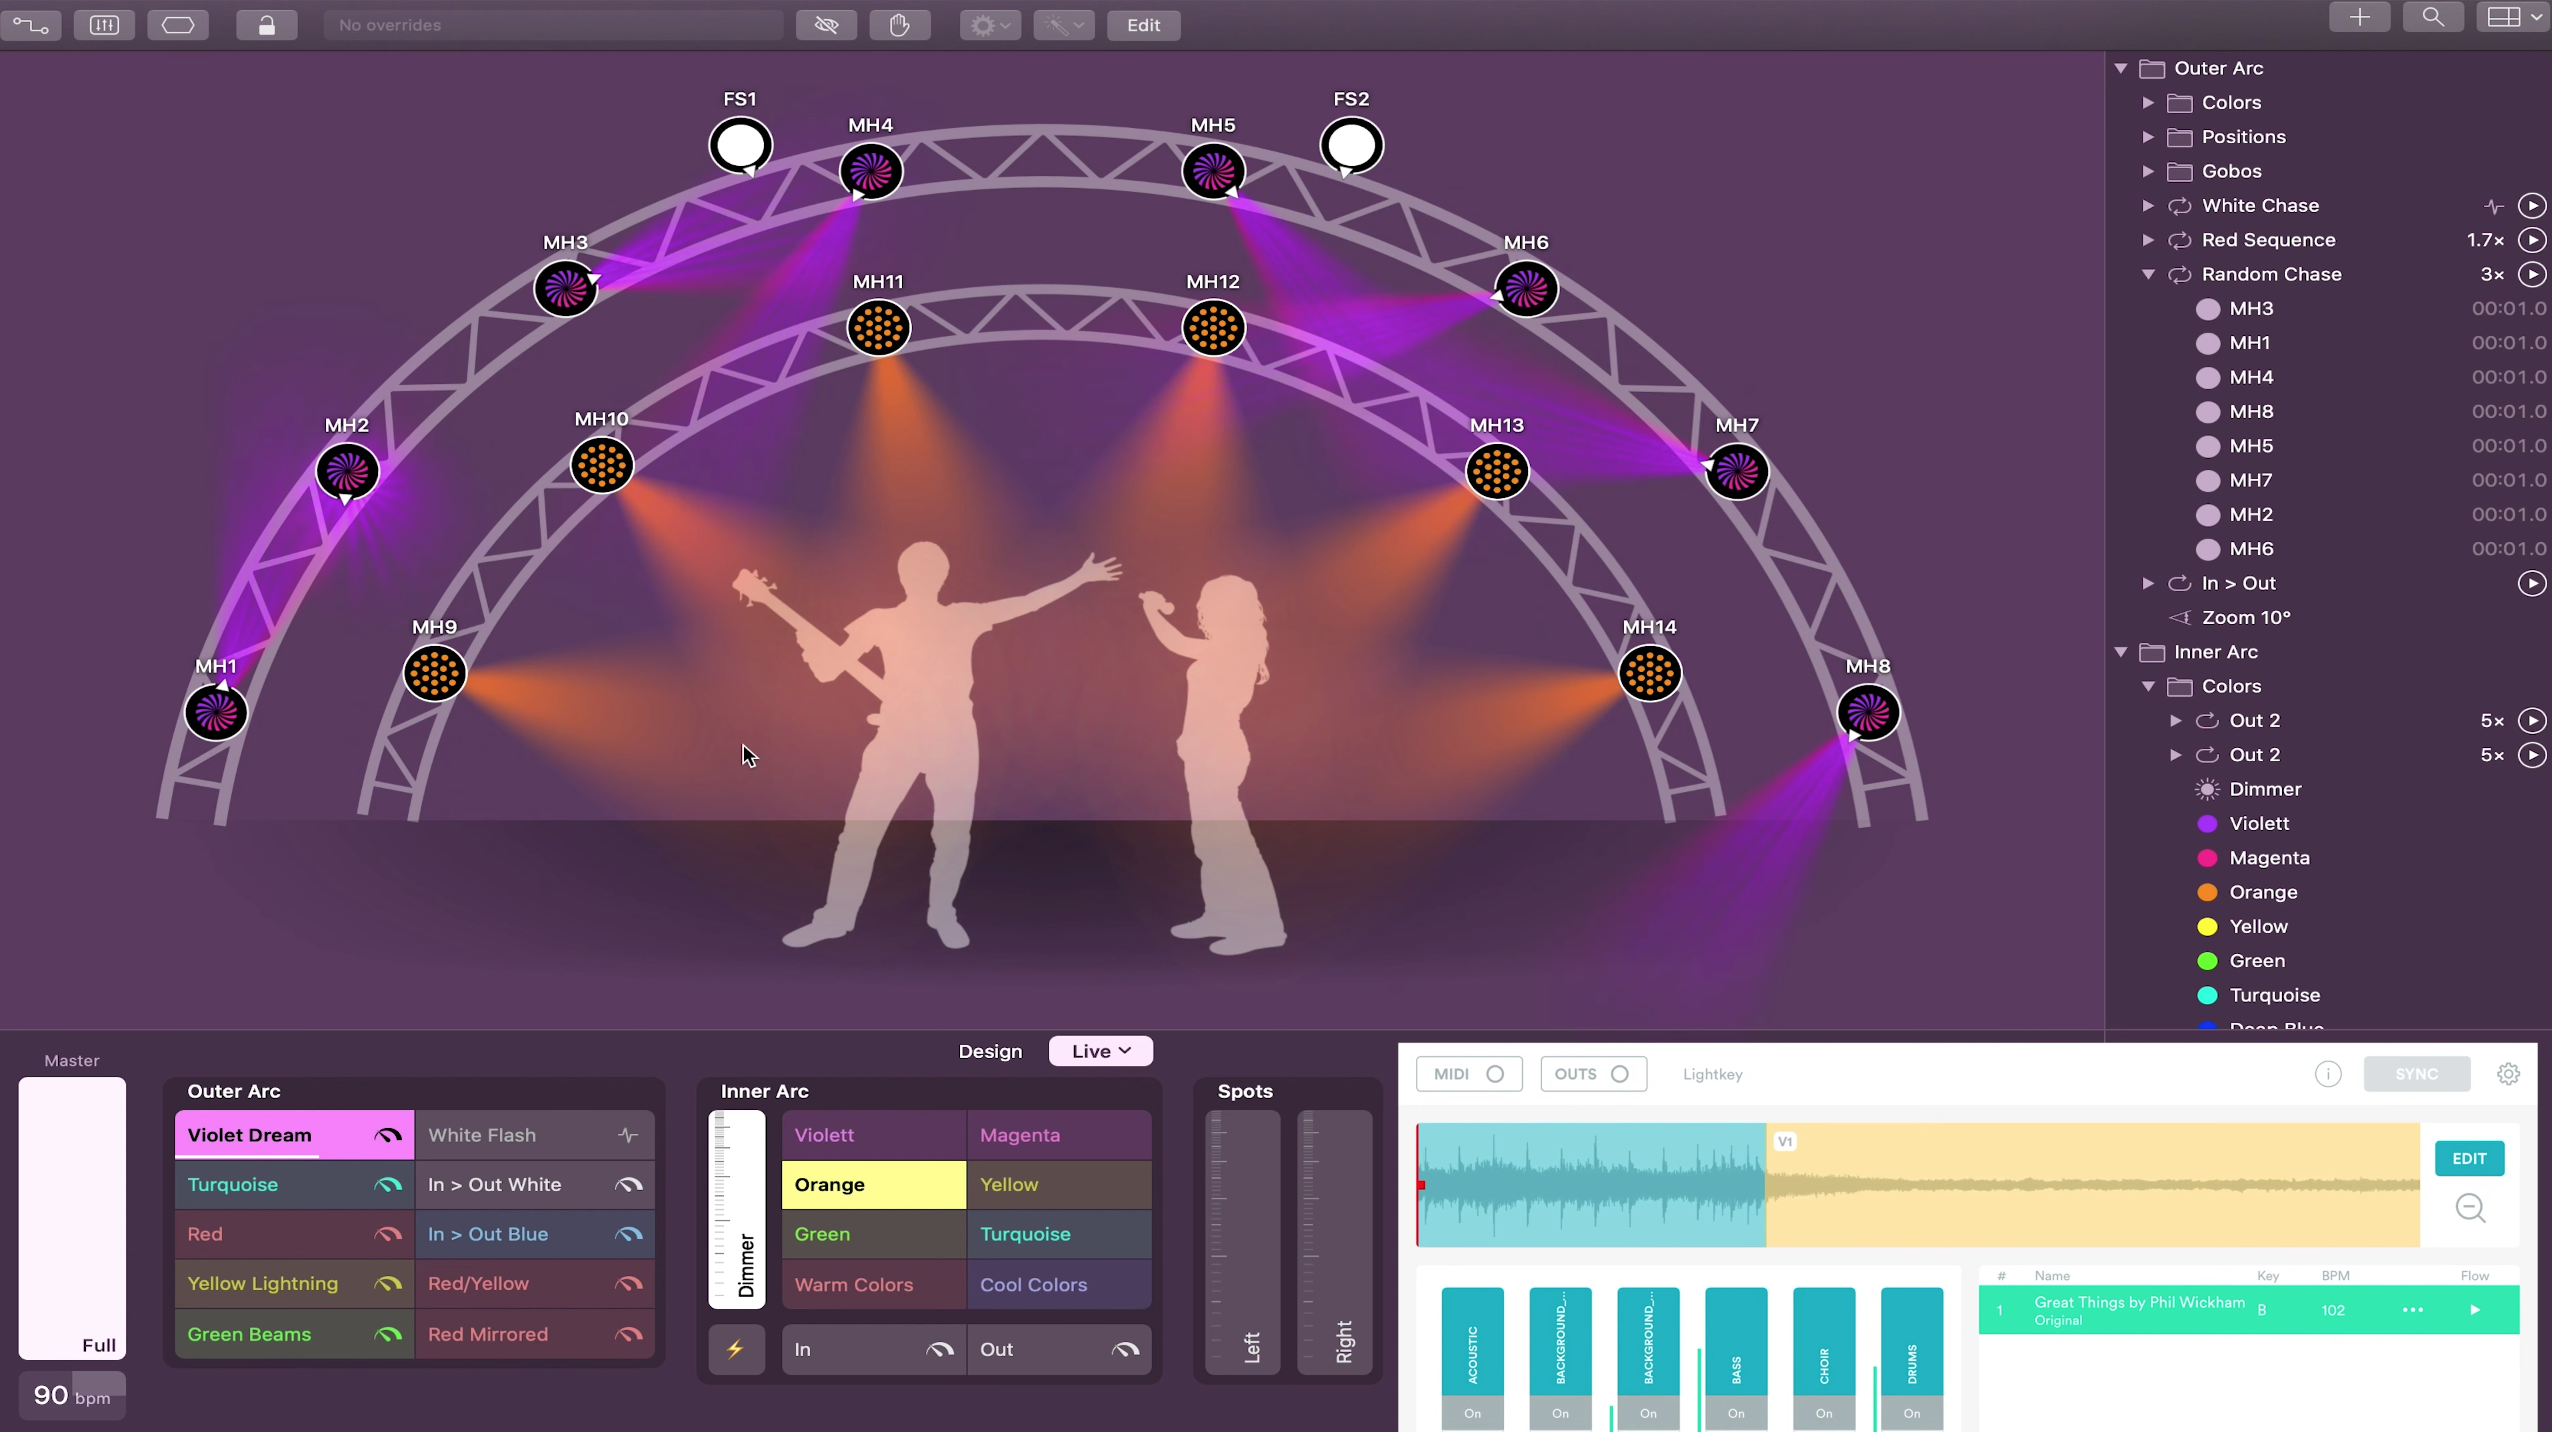
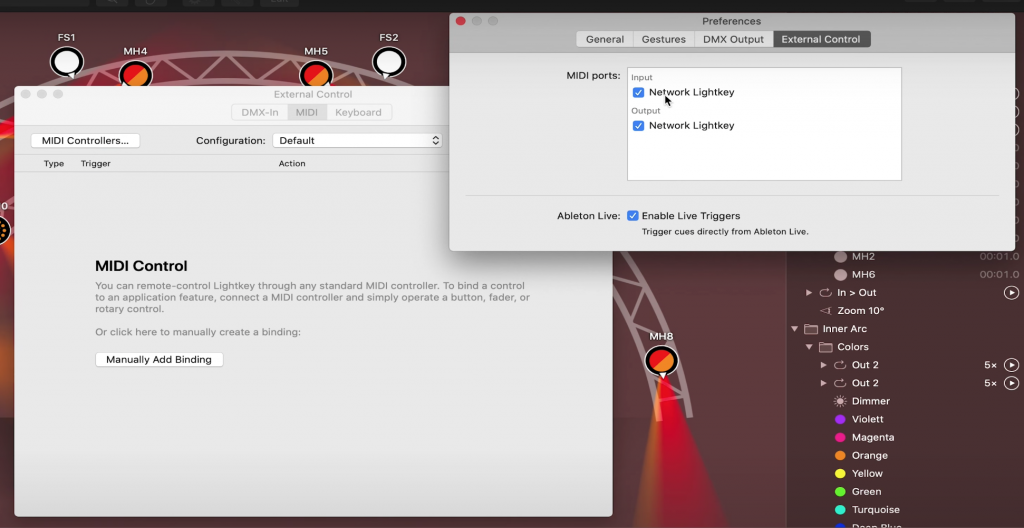
Lightkey has two main sections. The biggest and most eye catching section is a visual representation of the lighting on stage. More importantly is the control bar underneath it that holds all of the different lighting cues that are ready to be triggered. To set up Lightkey with Prime, click on the icon with three faders in the top left corner of the application. This button is the “External Control” button. A window will pop up. Select “MIDI Controllers…”, and a “Preferences” window should pop up.
You should see the Network Session you created, twice. There is one for input and one for output. Make sure they are enabled. Back in the “External Control” window, click on “Manually Add Binding”. Here is where we will link MIDI Cues to the lighting action of our choice.
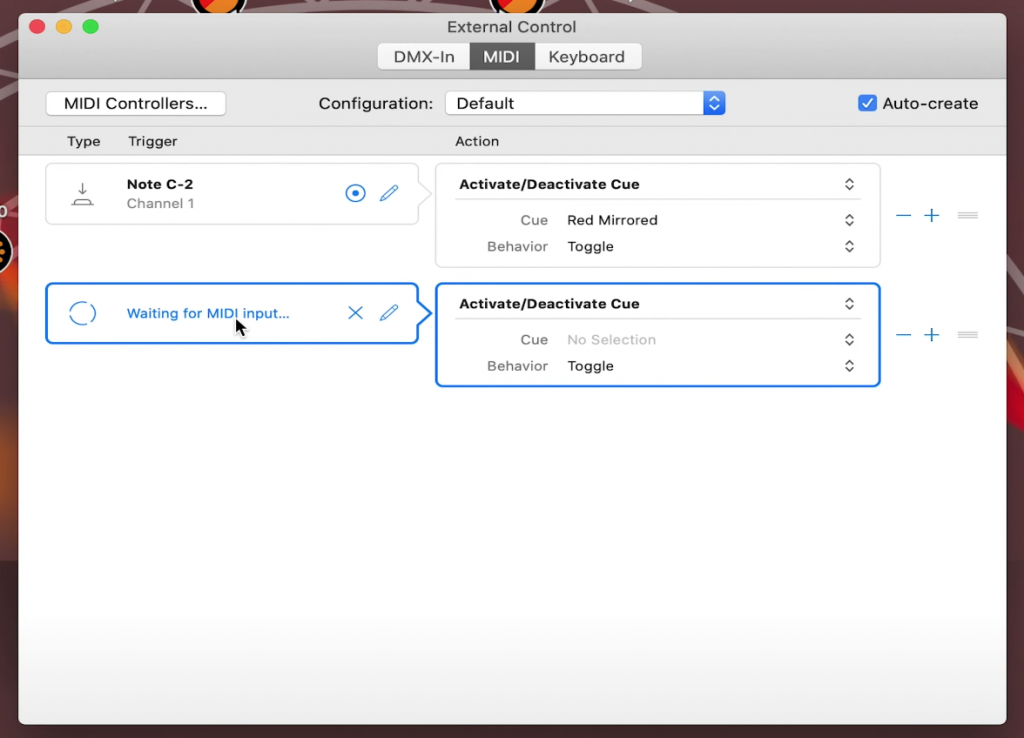
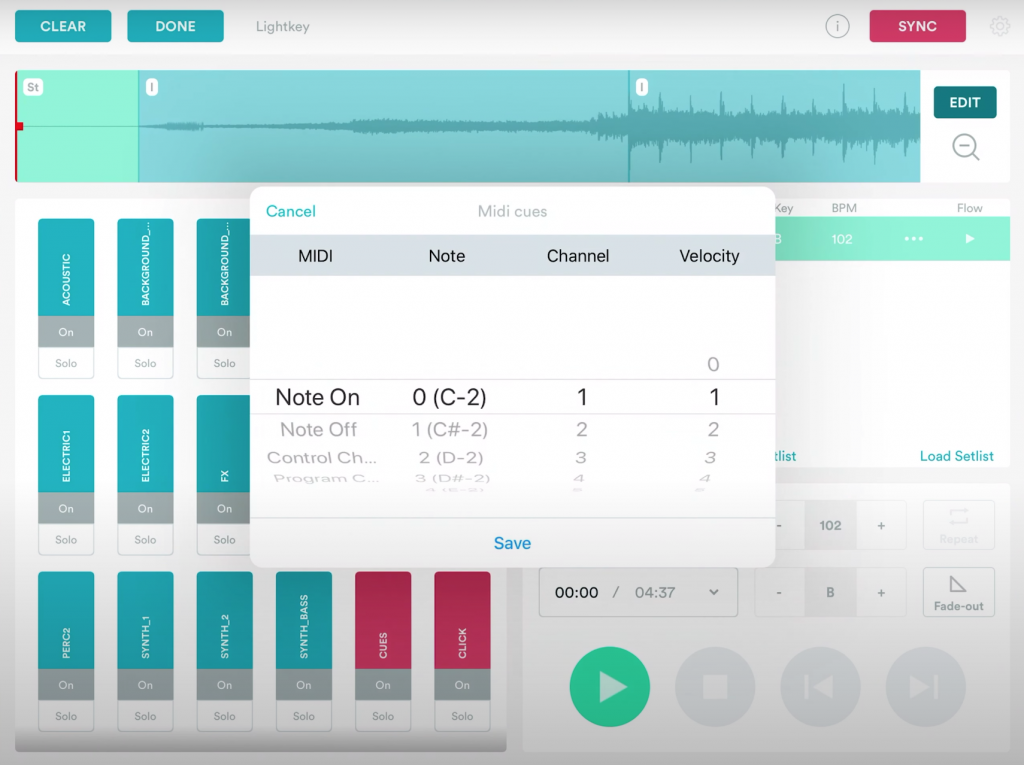
By default, there is already a MIDI cue in place. The default cue should read “Note C-2”. To the right of this is where you select the lighting that you want. If you want to change the default MIDI cue, click on the pencil next to the cue. Here you can edit the command, the channel, and the note.
These parameters give you tons of combinations at your disposal. The important thing to remember is that whatever parameters choose, you will need to copy them into Prime later. After you have set up the MIDI note, you will need to link it to a lighting action. To the right of the Note should read “No Selection”. Clicking on this will reveal a dropdown menu where you can select the lighting action you want. One of the more popular actions is “Active/Deactivate Cue”, which simply turns a light/set of lights on or off.
After selecting this, you will see a “Cue” dropdown menu under it. Clicking on this will give you the actual lighting types for you to choose from, most of them being different colors of lighting. After selecting this, you have set up a cue in Lightkey! You can create as many as you want by clicking in the “+” button on the right, but now let’s switch over to our device running Prime to see how to link the two together.
Setup in Prime
The first thing we’ll need to do in Prime is go to settings and select “Midi Cues Connections”. You should see your device that is running Lightkey. Go ahead and select it. All you have to do now is create the MIDI cues and place them where you want them in your song.
Back in the main window press “EDIT”, then “EDIT MIDI CUES”. You can now double tap anywhere on the waveform of the song to place a cue (Note that the cues will stay within the section they have been initially placed in). When double tapping, a pop-up window will appear with the same MIDI cue parameters from Lightkey. Match the cue parameters, hit save, then when you are done inputting your cues, hit “DONE” up at the top. Prime will now automatically trigger your lighting!
Prime’s MIDI cues is a great feature to automate your lighting for your worship set. To learn more about MIDI cues and other great Loop Pro features, click here!


0 Comments