Using Transitions in Prime

One of the awesome things about running your multitracks in the Loop Community Prime App, is that you can automate your entire setlist using transitions! Let me show you how this works.
In Prime, on the right hand side of your screen is a category that says “Flow”. Next to each track, is a symbol that represents the “Flow” or transition for that track. To toggle between these tracks, tap/click on the symbol. There are 5 transition options to choose from.

1.Default
The Default transition is represented by a triangle. This means that when this track is finished playing, it will stop and not continue onto the next track.
2. Auto-Advance
This transition is represented by an arrow. When Auto-Advance is selected, the track will automatically move onto the next song and start playing once the first song is finished.
3. Overlap
The Overlap transition is represented by two lines overlapping each other. In this mode, the next song will start to play during the end section of the first song. This creates an overlapping effect and removes any awkward break in between songs.
4. Crossfade
The Crossfade transition is represented by two lines crossing over each other. This mode is similar to Overlap, except with an added fade out of the first song and fade in of the second song. This mode is great for songs that have either abrupt endings or beginnings.
5. Trigger
Trigger Mode is represented by a box with an arrow coming out of it. With Trigger Mode, a track will get to the end, but instead of moving onto the next song, the click will continue playing. When you want the click to end and you want to move on, simply click on the Next or Stop button in Prime. This mode allows worship teams to continue playing to the track’s click, while cutting out the multitracks. This is great for your band if you want to end a song with only the real instruments in your band, perhaps in a down chorus or down bridge.
__
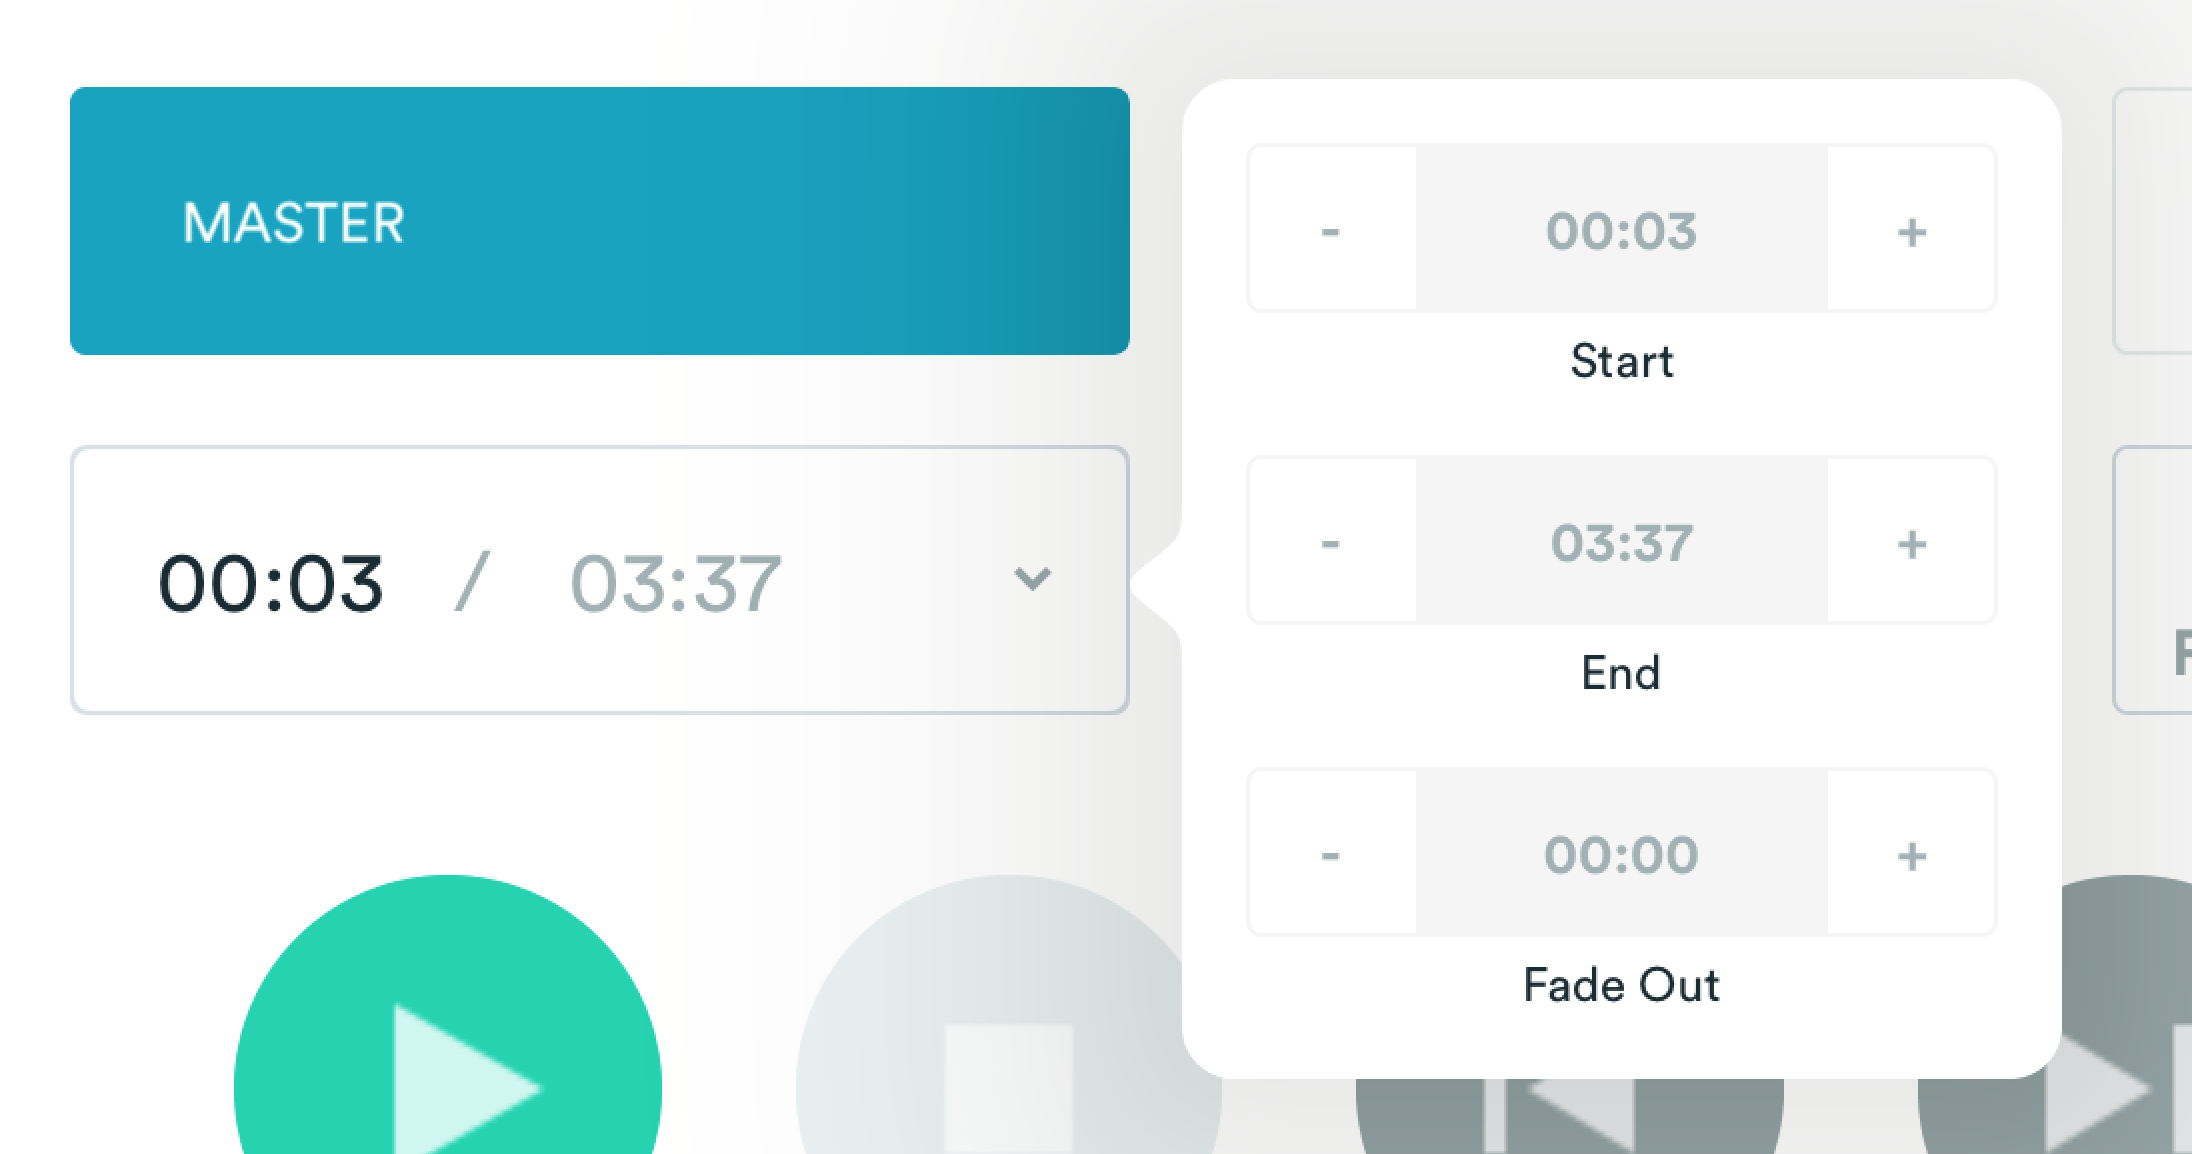
In addition to these modes, you have the ability to change the start time and end time of each song. To can do so by selecting the dropdown arrow next to a track’s timer. If you want a track to start later than the original start time, select the “+” symbol above the start section in this menu. If you want the track to end sooner in its end section, select the “-” symbol above the end section in this menu. There’s also a Fade Out option, if you want the track to fade out earlier in the end section. Feel free to change these settings in each track to get even further customization in order to get your song transitions just right.
Lastly, Prime offers a feature called Crossfade on Demand. With Crossfade on Demand, you have the ability to crossfade out and into the next song during any part of the song. To use this feature, have either the Overlap Mode or Crossfade Mode toggled on. Then, simply select the Next button during any point in that song. The song will then transition out and into the next song from whenever you are in the track!
With Prime transitions, you can automate your entire set so that it flows seamlessly without any pauses or awkward transitions. Make sure to check out Prime for free in the iOS/MacOS app store. Prime is the easiest way to run your tracks in worship!


0 Comments